Tampilkan postingan dengan label counter. Tampilkan semua postingan

Reset transfert belt counter on Xerox Phaser 6110 MFP

Selasa, 17 Januari 2012

0 komentar

Sometimes, when you have replaced the Image Transfer Belt, the printer still does not work. You will have to reset the counter.


Procedure:
Enter Service Mode by pressing [MENU] [#] [1] [9] [3] [4] quickly.Select Tech MenuSelect DataSetupArrow to Clear Counts and press EnterEnter Password 1934Arrow to Transfer Belt and press Enter.
The display will show Clearing Counts and then return you to the Tech Menu. Press exit several times to exit the Tech Menu and then power cycle the printer. More information click here

Read More..

How to reset Waste ink Counter on Canon Pixma MP480 printer

0 komentar

After a message error like "Ink Absorber is Full", you need to reset the printer to solve the issue:


Download the resetter software


Power cable and usb cable must be connected


Solution:

1. Turn off the printer without pulling the power cords.
2. Hold down STOP/RESET button and press Power button.
3. Keep holding down Power button and let STOP/RESET button go.
4. Then Press STOP/RESET button twice then let BOTH buttons go.
5. Alternate Blinking error is gone: your are in Service Mode state.
1. Extract the resetter software and double click "MP480.exe" W
2. Click Reload Button and you will get a new USB port.
3. Load some papers in your printer and press the "Main" Button once,
4. Wait until the printing is done.
5. Then press "EEPROM Clear" button to clear EEPROM.
6. Then press EEPROM button and the printer will print some text.
7. Then power off the printer and turn on again.
Read More..

How to reset drum counter on Oki B4400

0 komentar

Solution to reset the drum counter:
Open the Status Monitor.Click "Printer Setup" then "Open Configuration" and "Maintenance".Click Drum Counter Reset. Click Apply.Click OK

Réinitialiser le compteur du tambour
Ouvir le Status Monitor.Cliquer sur "Printer Setup" puis "Open Configuration" et "Maintenance".Cliquer sur Drum Counter Reset (Réinitialiser le compteur du tambour). Cliquer Apply (appliquer).Cliquer sur OK
Cero el contador del cilindro Abras Status Monitor.Clic en "Printer Setup" y "Open Configuration" y "Maintenance".Clic en Drum Counter Reset. Clic Apply (aplicar).Clic OK
Reiniciar o contador do cilindro Lance o Status Monitor.Clique com "Printer Setup", "Open Configuration", "Maintenance".Clique com Drum Counter Reset. Clique Apply (aplicar).Clique OK

Read More..

how to reset counter after tranfer belt and fuser replacement on clx2160n

0 komentar

Resetting the transfert belt's counter after replacement (CLP-300 Imaging Kit):
Press: Menu, #1934, Menu,
"Tech Mode" --> OK, 
"Data Setup" --> OK,
go to "Clear Counts" --> OK,
"Enter Password [????]" --> 1934, OK,
"Clear Counts [Total Page CNT]", go to "[Imaging Unit]" --> OK,
"Clearing…", --> Back.

Resetting the fuser's counter after replacement (JC96-03609A):
Press: Menu, #1934, Menu,
"Tech Mode" --> OK,
"Data Setup" --> OK,
go to "Clear Counts" --> OK,
"Enter Password [????]" --> 1934, OK,
"Clear Counts [Total Page CNT]", go to "[Fuser]" --> OK,
"Clearing…", --> Back.
More information click here
Read More..

how to reset counter after tranfer belt and fuser replacement on clx2160n

Minggu, 01 Januari 2012

0 komentar

Resetting the transfert belt's counter after replacement (CLP-300 Imaging Kit):
Press: Menu, #1934, Menu,
"Tech Mode" --> OK, 
"Data Setup" --> OK,
go to "Clear Counts" --> OK,
"Enter Password [????]" --> 1934, OK,
"Clear Counts [Total Page CNT]", go to "[Imaging Unit]" --> OK,
"Clearing…", --> Back.

Resetting the fuser's counter after replacement (JC96-03609A):
Press: Menu, #1934, Menu,
"Tech Mode" --> OK,
"Data Setup" --> OK,
go to "Clear Counts" --> OK,
"Enter Password [????]" --> 1934, OK,
"Clear Counts [Total Page CNT]", go to "[Fuser]" --> OK,
"Clearing…", --> Back.
Read More..

Reset transfert belt counter on Xerox Phaser 6110 MFP

0 komentar

Sometimes, when you have replaced the Image Transfer Belt, the printer still does not work. You will have to reset the counter.


Procedure:
Enter Service Mode by pressing [MENU] [#] [1] [9] [3] [4] quickly.Select Tech MenuSelect DataSetupArrow to Clear Counts and press EnterEnter Password 1934Arrow to Transfer Belt and press Enter.
The display will show Clearing Counts and then return you to the Tech Menu. Press exit several times to exit the Tech Menu and then power cycle the printer.

Read More..

How to reset Waste ink Counter on Canon Pixma MP480 printer

0 komentar

After a message error like "Ink Absorber is Full", you need to reset the printer to solve the issue:


Download the resetter software


Power cable and usb cable must be connected


Solution:


1. Turn off the printer without pulling the power cords.
2. Hold down STOP/RESET button and press Power button.
3. Keep holding down Power button and let STOP/RESET button go.
4. Then Press STOP/RESET button twice then let BOTH buttons go.
5. Alternate Blinking error is gone: your are in Service Mode state.


1. Extract the resetter software and double click "MP480.exe" W
2. Click Reload Button and you will get a new USB port.
3. Load some papers in your printer and press the "Main" Button once,
4. Wait until the printing is done.
5. Then press "EEPROM Clear" button to clear EEPROM.
6. Then press EEPROM button and the printer will print some text.
7. Then power off the printer and turn on again.

Read More..

How to reset drum counter on Oki B4400

0 komentar

Solution to reset the drum counter:
Open the Status Monitor.Click "Printer Setup" then "Open Configuration" and "Maintenance".Click Drum Counter Reset. Click Apply.Click OK

Réinitialiser le compteur du tambour
Ouvir le Status Monitor.Cliquer sur "Printer Setup" puis "Open Configuration" et "Maintenance".Cliquer sur Drum Counter Reset (Réinitialiser le compteur du tambour). Cliquer Apply (appliquer).Cliquer sur OK
Cero el contador del cilindro Abras Status Monitor.Clic en "Printer Setup" y "Open Configuration" y "Maintenance".Clic en Drum Counter Reset. Clic Apply (aplicar).Clic OK
Reiniciar o contador do cilindro Lance o Status Monitor.Clique com "Printer Setup", "Open Configuration", "Maintenance".Clique com Drum Counter Reset. Clique Apply (aplicar).Clique OK

More information click here
Read More..

Reset Waste Ink Counter Procedure for Canon Pixma MP110

Minggu, 18 Desember 2011

0 komentar
To reset Canon Pixma MP110 printer there are two steps you have to do, that is enter to service mode then reset waste ink counter.

Here the complete steps to reset Printer Canon Pixma MP110:


Step 1. Enter Service Mode: 
Turn ON the printerPress these button in the following order correctly: MENU,SCAN,COPY,SCAN Step 2. Reset Waste Ink Counter Procedure for Canon Pixma MP110
Press right arrow untill "COUNTER ACCESS" appears then press OKPress right arrow untill "ABS-M DOT COUNT" appears then press COPY Set "ABS-M DOT COUNT" to 0 by pressing left arrow then press OKPress STOP/RESET to exit service mode. Once this procedure finished your printer should work normally.

Source

Read More..

Reset Waste Ink Counter Canon Pixma iP6210D and iP6220D

Sabtu, 17 Desember 2011

0 komentar
This tutorial waste ink counter pad below can be applied to the canon pixma iP6220D, iP6220D.

Here the procedure to reset waste ink counter for canon pixma iP6220D,iP6220D as state in canon pixma iP6210D service manual.


Step 1. Enter Service Mode

Plug in power cable to electric source.
Press and hold RESUME/CANCEL buttonPress POWER buttonRelease RESUME/CANCEL buttonPress RESUME/CANCEL button twice in a rowStep 2. Reset Waste Ink Counter Operation
Press RESUME/CANCEL button 4 times in a rowTurn of the printer and then turn on again the printer. the Ink counter has been reseted
 

Source

Read More..

Reset Waste Ink Counter Canon Pixma iP6210D and iP6220D

Jumat, 16 Desember 2011

0 komentar
This tutorial waste ink counter pad below can be applied to the canon pixma iP6220D, iP6220D.

Here the procedure to reset waste ink counter for canon pixma iP6220D,iP6220D as state in canon pixma iP6210D service manual.


Step 1. Enter Service Mode

Plug in power cable to electric source.
Press and hold RESUME/CANCEL buttonPress POWER buttonRelease RESUME/CANCEL buttonPress RESUME/CANCEL button twice in a rowStep 2. Reset Waste Ink Counter Operation
Press RESUME/CANCEL button 4 times in a rowTurn of the printer and then turn on again the printer. the Ink counter has been reseted
 
Read More..

Reset Waste Ink Counter Procedure for Canon Pixma MP110

0 komentar
To reset Canon Pixma MP110 printer there are two steps you have to do, that is enter to service mode then reset waste ink counter.

Here the complete steps to reset Printer Canon Pixma MP110:


Step 1. Enter Service Mode: 
Turn ON the printerPress these button in the following order correctly: MENU,SCAN,COPY,SCAN Step 2. Reset Waste Ink Counter Procedure for Canon Pixma MP110
Press right arrow untill "COUNTER ACCESS" appears then press OKPress right arrow untill "ABS-M DOT COUNT" appears then press COPY Set "ABS-M DOT COUNT" to 0 by pressing left arrow then press OKPress STOP/RESET to exit service mode. Once this procedure finished your printer should work normally.

Read More..

Reset Waste Ink Pad Counter Epson C-90

0 komentar


firstly, download Resetter for Epson C90 Epson C90.And Resetter for Epson C110 download here. The method how to reset C90 and C110 is not different, u just change the date.


I. The Methods how to Reset Epson C90:
a. Surely your printer joined to computer,turn on printer.
b. Ekstrak resetter C90.
c. See folder resetter_epson_c90. turn reset.bat, change date be
10/07/2007.
d. Minimize command prompt reset.bat.
e. Turn “AdjProg.exe”.
f. Klik “Accept”.
g. Klik “Particular adjustment mode”.
h. Then choose Waste Ink pad Counter OK.
i. Klik button “Check”, till process finish.
j. Klik button “Initialization” then klik “Finish”.
k. Power off printer, then turn on .
l. If success, come back to command prompt reset.bat. Change date
as usual.
m. Surely printer C90 normally, test print.

stylus photo C90 Verion Indonesia download
stylus photo C92 Version Singapore download

Read More..

Reset Protection Counter for Epson 1390

Sabtu, 14 Mei 2011

0 komentar

Reset Protection Counter for Epson 1390


Please follow the steps below to reset the protection counter effectively.

1. If you have any anti virus software, please deactivate first.
The resetter software (adjprog.exe) requires specific date to run and your anti virus will prevent that.
2. Make sure you printer is ON and connected to your computer.
3. Run “Start.bat” file.
This program will set your computer date to 4 Oct 2007.
4. Click “Accept” button.
5. Click “Particular adjustment mode” button.
6. Select on “Waste ink pad counter” and click “OK” button.
7. Click on “Initialization” button and the program will reset the protection counter.
8. Click “Finish” button.
9. Change your computer’s date back when it prompted.
10. Reactivate your anti virus if any.
download here

Read More..

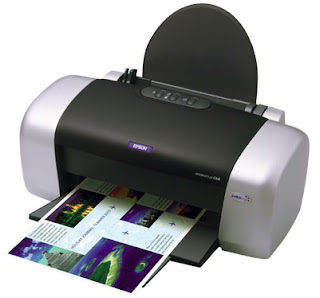
How to Reset counter EPSON STYLUS C63, C64, C65, C66

0 komentar

https://blogger.googleusercontent.com/img/b/R29vZ2xl/AVvXsEi6dXKXRx0R7dRZk9vvdqFDQ0h5y9nggdW6onsE1XyHuCxliOlP0Ph-b8rMl12d-w1o21JZ6nytITAuHhOvAgMHrUZPDsiN3_-6kexCHW3SsX-j64hdlyj1DhedoLaCbI4nQigq8ZFj4dA/s320/Epson+Stylus.jpg

Resetting using adjustment program:

1. Run adjustment software by clicking “APSC6364_Ver16.exe”
2. Set model name and port, Ok
3. Click maintenance tab
4. Check waste ink pad counter
5. Click reset

Resetting using SSC serve ver 4.30

* Run SSC serve software
* Set printer model setting in ssc serve to C63/C64/C65/C66 the close the setting
* Right click ssc icon in system tray, select protections counter, select reset protection c counter.
* Clcik Yes
download software here

Read More..

Copyright © 2010 Fix Your Printer By Self | Powered By Blogger